This tutorial will show you how to set up a serial console on a Linux system, and connect to it via a null modem cable. This is quite useful if your Linux server is in a headless configuration (no keyboard or monitor), as it allows you to easily get a console on the system if there are any problems with it (especially network problems, when SSH is not available). In the end, the GRUB menu will appear over the serial link, as will the bootup messages (output when booting the system). I'm using Debian Etch on the server and Ubuntu Edgy on my client, although this should work on any Linux distribution.
First steps
One of the most important things we need to check that you do actually have a serial port on the server 😃. Take a look at the back of your server, and see if it has a 9-pin serial port. Most motherboards have either one or two serial ports. On the system, check to see that Linux is recognising the serial ports:
root@server:~#  dmesg | grep tty
serial8250: ttyS0 at I/O 0x3f8 (irq = 4) is a 16550A
00:08: ttyS0 at I/O 0x3f8 (irq = 4) is a 16550A
This shows that my system has one serial port, ttyS0 (remember this for later).
GRUB configuration
The next step is to edit the GRUB configuration, so it sends its messages to the serial console. One of the most important things is to set a password, otherwise anyone can connect a serial cable, edit the GRUB configuration line while the system is booting (via the "e" key), and get root access. When a password is set, interactive menu editing will be disabled, unless the correct password is entered. To set the password, we first need to get the encrypted version of it.
Run grub, and use the "md5crypt" command to encrypt the password:
grub> md5crypt

Password: ********
Encrypted: $1$AlfMq1$FxRolxW5XvSLAOksiC7MD1
Copy the encrypted version of the password (we need it for the next step), and then type quit to exit.
Now, we need to edit the GRUB configuration. Edit the /boot/grub/menu.lst file (by typing nano /boot/grub/menu.lst), and find this section:
## password ['--md5'] passwd
   # If used in the first section of a menu file, disable all interactive editing
   # control (menu entry editor and command-line)  and entries protected by the
   # command 'lock'
   # e.g. password topsecret
   #      password --md5 $1$gLhU0/$aW78kHK1QfV3P2b2znUoe/
   # password topsecret
Below that, add:
password --md5 $1$AlfMq1$FxRolxW5XvSLAOksiC7MD1
serial --unit=0 --speed=38400 --word=8 --parity=no --stop=1
terminal --timeout=10 serial console
Replace $1$AlfMq1$FxRolxW5XvSLAOksiC7MD1 with the encrypted form of your password. The second line tells GRUB to initialise the serial port at 38,400 bps (same speed as the standard console), 8 data bits, no parity, and 1 stop bit (basically, the standard settings). Note that the --unit=0 means that it will use the first serial port (ttyS0). If you're using the second serial port (ttyS1), change it to** --unit=1**. The last line tells GRUB to show its menu on both the serial line and the console (monitor).
Now, we also need to edit the kernel sections, so that they output messages to the serial console. At the end of every kernel line, add console=tty0 console=ttyS0,38400n8 (replace ttyS0 with the correct serial port). In my case, it ended up looking like:
title           Debian GNU/Linux, kernel 2.6.18-4-vserver-686
   root            (hd0,1)
   kernel          /vmlinuz-2.6.18-4-vserver-686 root=/dev/hda3 ro console=tty0 console=ttyS0,38400n8
   initrd          /initrd.img-2.6.18-4-vserver-686
   savedefault
title           Debian GNU/Linux, kernel 2.6.18-4-vserver-686 (single-user mode)
   root            (hd0,1)
   kernel          /vmlinuz-2.6.18-4-vserver-686 root=/dev/hda3 ro single console=tty0 console=ttyS0,38400n8
   initrd          /initrd.img-2.6.18-4-vserver-686
   savedefault
title           Debian GNU/Linux, kernel 2.6.18-3-686
   root            (hd0,1)
   kernel          /vmlinuz-2.6.18-3-686 root=/dev/hda3 ro console=tty0 console=ttyS0,38400n8
   initrd          /initrd.img-2.6.18-3-686
   savedefault
title           Debian GNU/Linux, kernel 2.6.18-3-686 (single-user mode)
   root            (hd0,1)
   kernel          /vmlinuz-2.6.18-3-686 root=/dev/hda3 ro single console=tty0 console=ttyS0,38400n8
   initrd          /initrd.img-2.6.18-3-686   savedefault
Save and exit, by pressing CTRL+O (to "output", or save the file), Enter (to accept the file name) and CTRL+X (to actually exit).
Allow logins over Serial Console
Now, the GRUB menu will appear over the serial connection, but we still aren't listening for logins over it (there's no "getty" running on it yet). Edit the /etc/inittab`` file, and find this section:
# Example how to put a getty on a serial line (for a terminal)
#
#T0:23:respawn:/sbin/getty -L ttyS0 9600 vt100
#T1:23:respawn:/sbin/getty -L ttyS1 9600 vt100
Below that (I don't like editing the default lines 😛), add:
T0:2345:respawn:/sbin/getty -L ttyS0 38400 vt100
And that's all there is to it. Your server will now show the GRUB menu over the serial console, and also allow logons (once it has finished booting).
Let's test it!
Now that that's all done, we need to configure our client. I'm using GtkTerm on my laptop, although any terminal program should work (as long as it can use a serial port. On Windows, HyperTerminal should work). My laptop doesn't have a serial port, so I'm using a USB to Serial adapter I bought off eBay (it creates a ttyUSB0 device). Set your terminal program to these settings:
- Port (Linux):
ttyS0orttyS1(if your system has a serial port), orttyUSB0(if you're using a USB to Serial converter). - Port (Windows): COM1 or COM2
- Bits per second: 38400
- Data bits: 8
- **Parity: **None
- Stop bits: 1
- Flow control: None, although hardware (RTS/CTS) should work properly
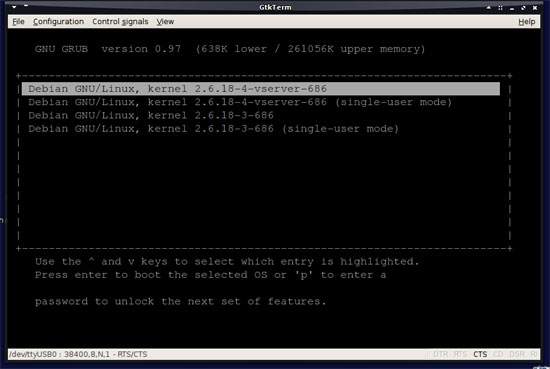
Restart the server (probably from a SSH connection, or however you edited the GRUB config above), and then connect the null modem cable as it's starting (ie. at the BIOS screen). Press any key when prompted, and you'll get something like:

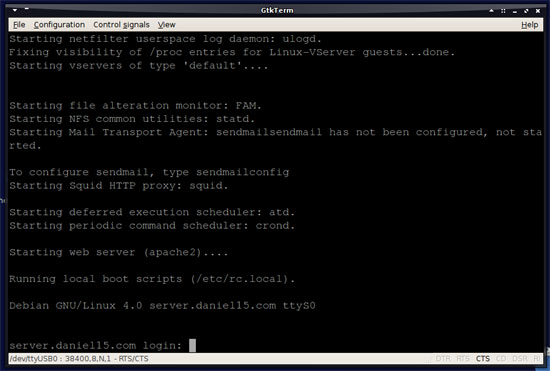
This means that GRUB is working fine 😃. Press enter, and it should boot, showing all messages in the terminal window. Once it boots, it will look something like:

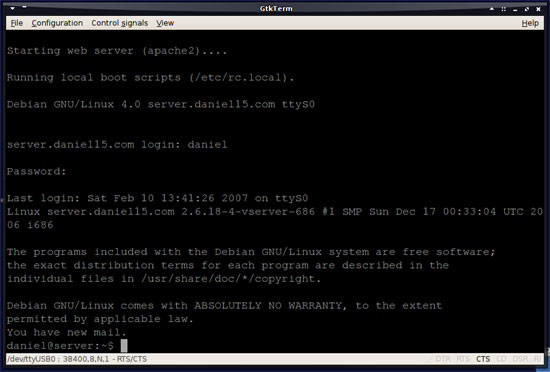
Finally, log in, and check that it works fine:

Congratulations, everything is set up and working fine.
Hope you enjoyed this tutorial! 😃
Comments